Tip
Check out:
our DEMO system
our Video tutorials
our GitHub sponsors => a way of supporting the project
Condition
Description
Conditions are used in the output-workflow.
They run in a timed loop just like input devices.
Conditions must be matched before an action is executed or reversed.
A condition must be linked at least with an output device or an output model.
The matching rules are connected to the condition via condition links.
It can also be linked to areas. This will filter the output devices, that would be started, to the ones that are a member of this area.

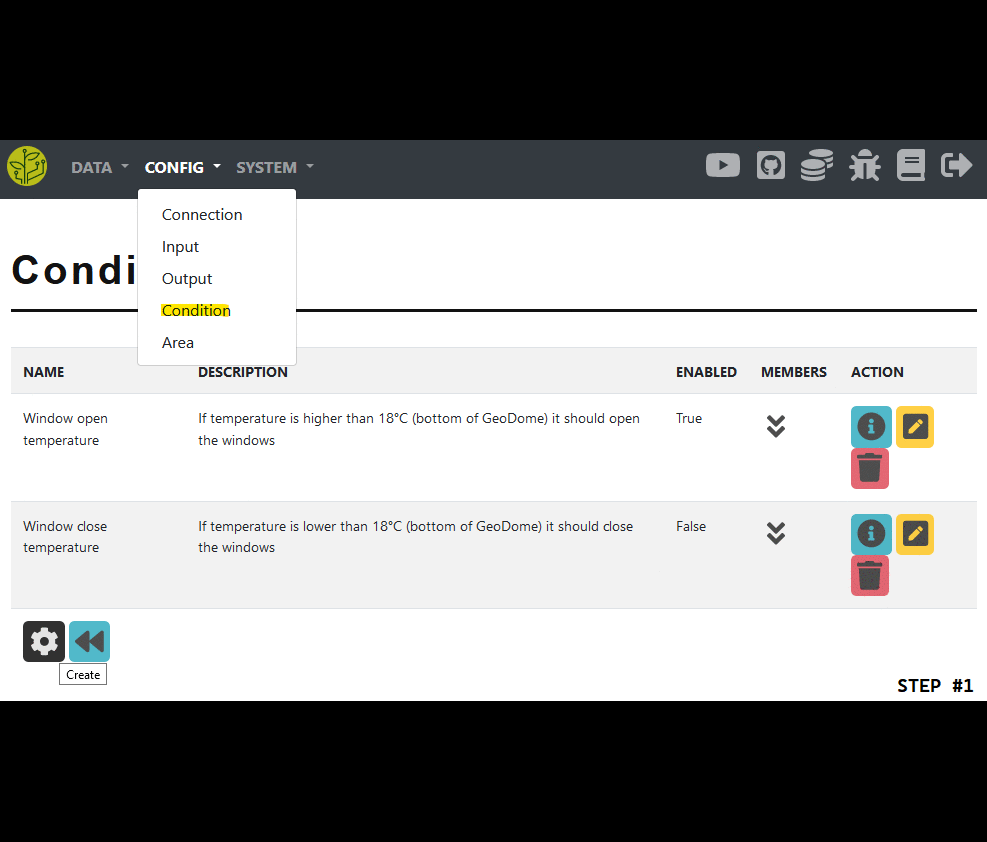
Create
Here we will go through on how to configure a condition.
Default
We will go through this config with the following example:
There is a window opener actor
This window should be opened when the (average) air temperature is higher than 18°C for 2 hours
Config
The following steps are needed to configure such a condition:
Create the condition
Open the condition config website
Press the create button at the bottom of the page
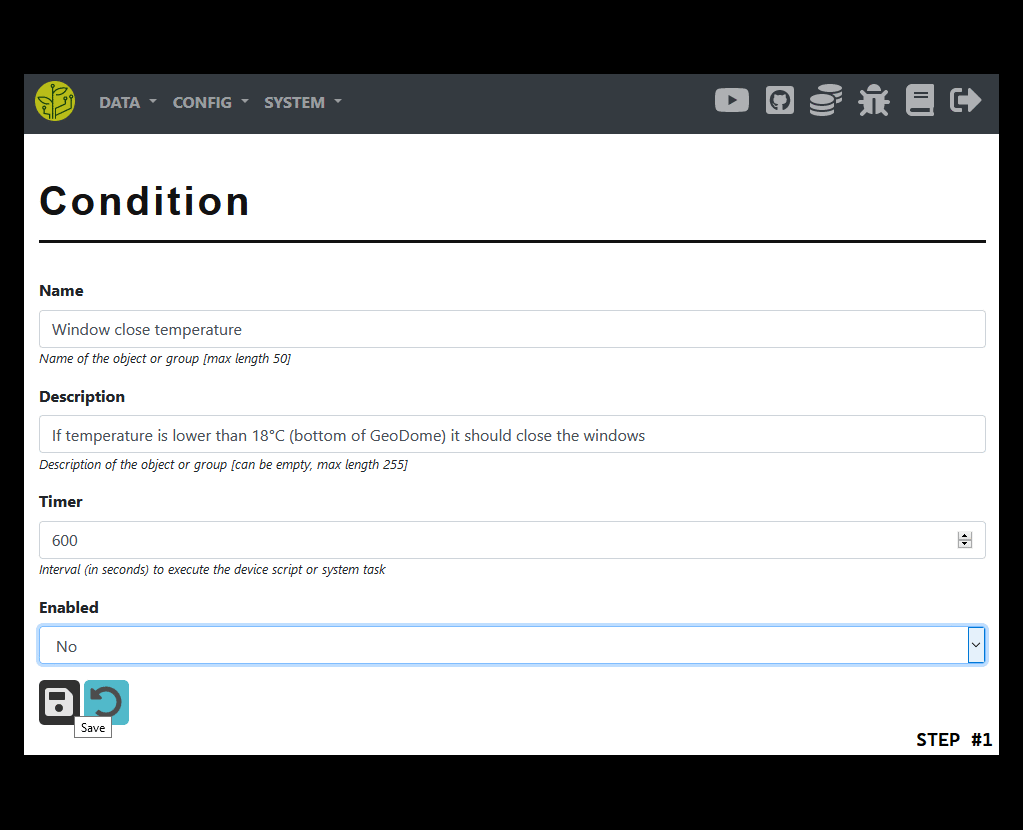
Enter a name and optionally a description
You must choose an interval (in seconds) in which to run the conditional check
If the condition is enabled its timer will be run
Create a link
Open the member view by pressing the ‘member’ button
As a member type choose ‘condition link’ and press the ‘create’ button
Enter a name and choose an operator => you can find more info in the ‘info’ section below
Create a match
In the condition link view open the members of the newly created link
As a member type choose ‘condition match’ and press the ‘create’ button
Enter a name and optionally a description
You must choose one of the following options as a source for the data
Input device => a single device
Input model => all devices of a given model (can be filtered by area)
Special match => some other comparison like time/date/datetime/day_week/day_month
Provide a comparison value, operator, check type and period => you can find more info in the ‘info’ section below
Add the match to the link
In the condition link view open the members
As a member type choose ‘condition match’ and press the ‘add’ button
Choose an order and the match you want to add
Re-check your link config
Add the link to the condition
In the condition view open the members
As a member type choose ‘condition link’ and press the ‘add’ button
Add an output
In the condition view open the members
As a member type choose one of the following and press the ‘add’ button
Output device => a single device
Output model => all devices of a given model (can be filtered by area)
Re-check your condition config
Reverse
A reverse condition is evaluated when it comes to stopping the actor.
We will go through this config with the following example:
There is a window opener actor
This window should be closed when the (average) air temperature is lower than 18°C for 30 minutes
Config
The following steps are needed to configure such a condition:
Creating the condition itself and its link
You must disable it
The timer setting can be ignored
Create a condition link as showed above in the ‘default’ section
Create a condition match
Choose the input device or model to evaluate
Set the target value of the match
Choose the comparison type and operator
Configure the period
Add the match to the link
Add the link to the condition
Edit the existing output model or add a new one
Configure the reverse condition
Choose the newly created condition
Configure the reverse settings as needed
Info
Condition link
Links allow conditions to have complex structures.
They are used to calculate the result of two member-items.
Linking targets
two condition matches,
one match and a nested condition or
two nested conditions
Processing types
AND => both members must match
NOT-AND => neither or just one member must match
OR => at least one member must match
NOT-OR => none of the members must match
XOR => only one member must match, the other one must not
NOT-XOR => either both or none of the members must match
NOT => the first one must match, the second one must not
Condition match
A condition match is a single rule to match.
It will compare data to some given value using an operator.
Sources of data
Input device => a single sensor device
Input model => all devices of a given sensor model
They can be filtered by an area => only the devices in the given area will be used for the data selection
Special match => some other comparison like:
time => comparison with the current time of the day
date => comparison with the current date
datetime => comparison with the current date and time
day_week => comparison with the current day of the week
day_month => comparison with the current day of the month
Periods
Periods are used to pull data-points for the match comparison.
There currently are two types of periods to use.
RANGE => the last N data-points of the given device(s)
TIME => all data-points in a given time period (in seconds)
Check types
These check types are used to calculate the final data for comparison from the given pool of datapoint pulled from the database.
If the data type is neither integer nor float those calculations will be skipped.
AVG => get the average value
MIN => get the smallest value
MAX => get the largest value
Operators
EQUALS => whether the calculated data is equal to the configured value
NOT => the data must not be equal to the value
BIGGER (<) => whether the data is bigger than the value
SMALLER (>) => whether the data is smaller than the value